Quality

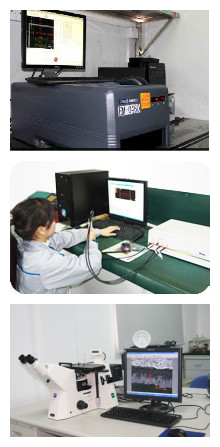
Main Detecting Machines:
1. High-Voltage E-test
2. Flying Probe Machine
3. Digital Computer Metallograghic Microscope
4. Copper Thickness Tester
5. Solderability Detecting Machine
6. Photoelectricity Balance
7. X-ray Gold Thickness Tester
8. Backlighting Tester
9. Automatic Optical Inspector
Quality Standard:
1.Drilling tolerance
1.1 Requested hole diameter tolerance:±0.025mm
1.2 Requested hole diameter precision: ±0.070mm
1.3 Minimum diameter of drilling hole: 0.10mm, maximum once-drilling hole diameter: 6.5mm
1.4 Minimum diameter of punching hole:0.7mm, tolerance : ±0.05mm
1.5 No scratch, bur, leak drilling, wrong drilling
1.6 The copper thickness of the barrel after PTH and electroplating in accordance with IPC standard or customers’ requirements
2. Image Transfer
2.1 PCB Request of the customer±10%~20%
2.2 Minimum conductor width 0.075mm, minimum conductor space 0.15mm, minimum weld ring 0.07mm
3.Image Electroplating
3.1 Nickel thickness 5μm, gold thickness in accordance with customers’ requirements
3.2 The plating layer will be stable, no color change, no particle
4.Solder Mask and Printing of Legend
4.1 Thickness of solder mask 12-15μm
4.2 No shed, no soften and clear
4.3 solderibility 260±10℃,surface tin fusing 10 seconds
4.4 The HRC and Heat Degree of the Thermosetting Green oil is 6H,UV Oil-length More than 4H
5.Hot air Solder Leveling
5.1 Thickness 3-5μm, allow different thickness of two surfaces
5.2 No taphole, no tin, smooth surface
6. Degree of Warp
Degree of twist and bow 0.75%:
7. Process External Frame
7.1 Routing Common Difference ±0.15mm
7.2 Die-cut mould Common Difference ±0.12mm
8.FQC and Computer Test
8.1 Finished board 100% test, FQC inspect the appearance according to the IPC II standard
8.2 Eye inspect pass rate above 98% We do the control strictly in the producing procedure and the products would be 100% inspected with eyes; we will do the occasional check on normal problems according to the AQL2.5 and accept it according to IPCII the standard. We do general test before delivery in a bid to guarantee the quality. The general test includes: solderibility test, solder resistance test, thermal shock resistance test, hole diameter and outline dimension.

